Velosio Support App Installation
A consultant from Velosio will need to install and configure the app. Once configured, support cases can be created.
How-to configure the Velosio Support App
Install the app in Business Central through Extension Management.
In CRM, look up the client and open their account page.
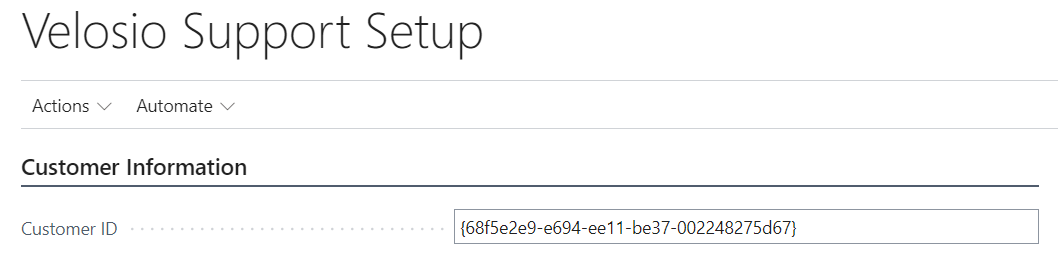
In the URL at the top there is a GUID. Copy the GUID to your clipboard:

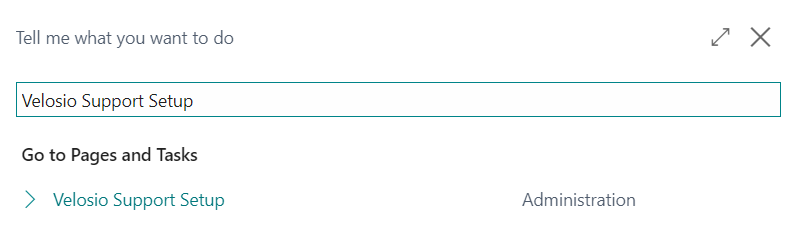
In Business Central, search for Velosio Support Setup and select the related link:
Paste the GUID into the Customer ID field and close the page:
Now, cases can be created in CRM through the Velosio Support App!
How-to change the CRM instance
By default, the CRM instance is pointed to production. However, if it needs to be changed to point at a UAT environment the following steps can be taken:
In Business Central, search for Velosio Support Setup and select the related link:
Personalize your page and show the Override Support Values button:
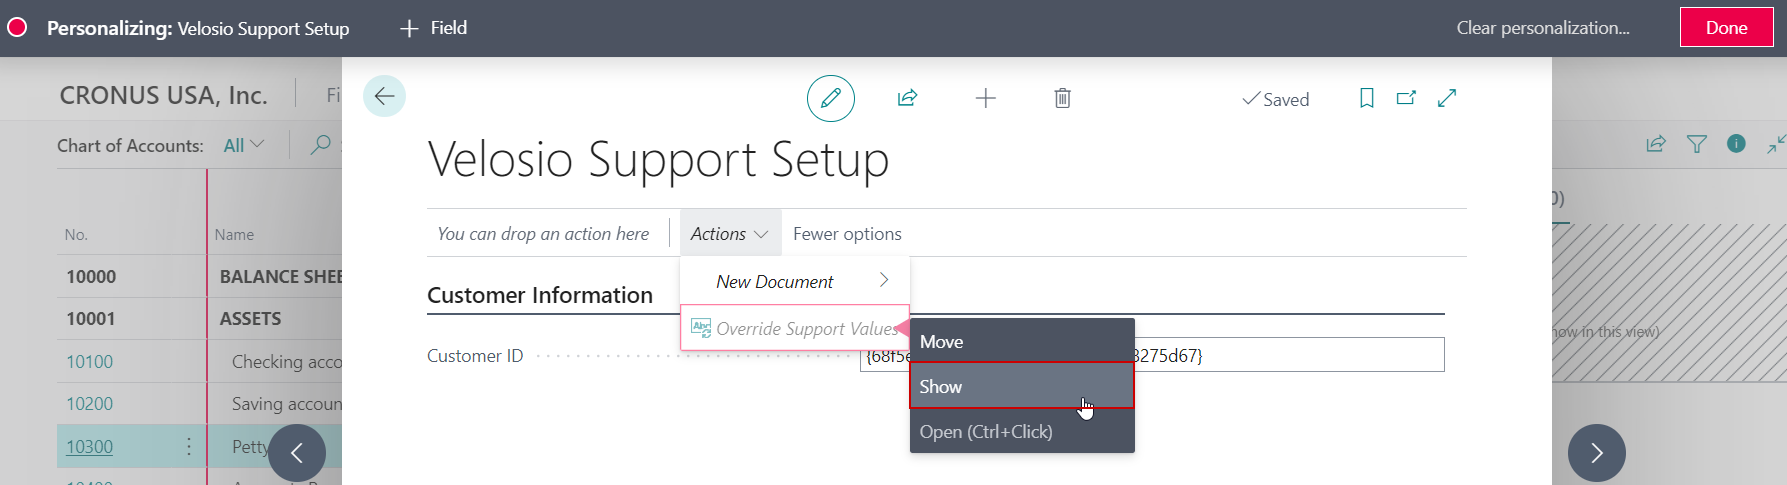
On the menu, choose the Override Support Values button:
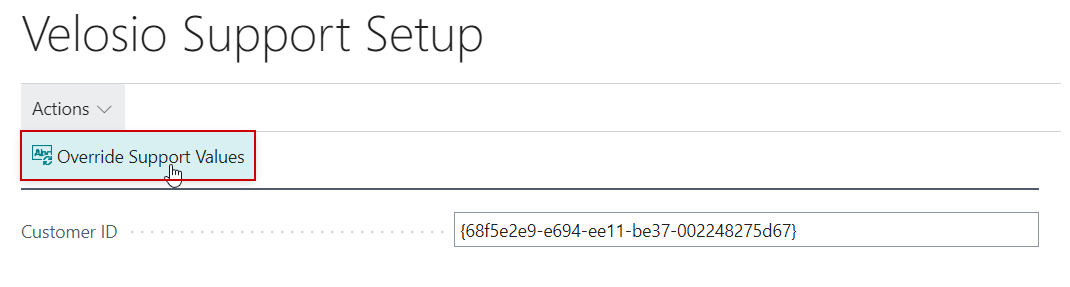
In the Override Base URL, enter the appropriate CRM URL:
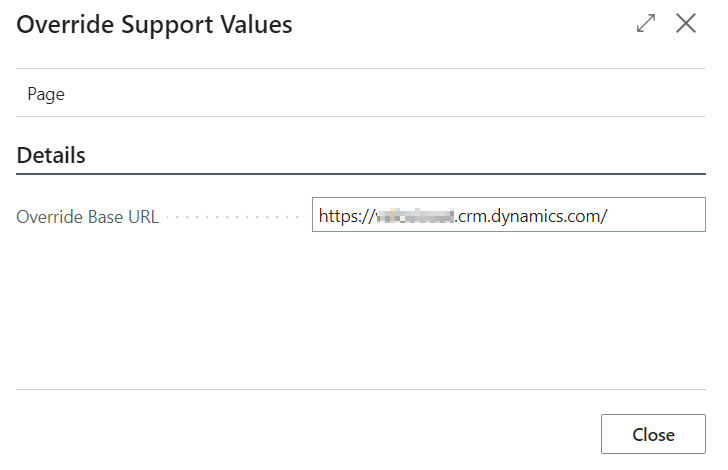
Click Close and the Velosio Support App will now be pointed to the new CRM URL.